 Insert a button-head screw into one of the holes
on the x-frame. Loosly thread a T-slot nut onto the screw just enough to keep it in place. Repeat
until all eight screws are installed in each of the frames.
Insert a button-head screw into one of the holes
on the x-frame. Loosly thread a T-slot nut onto the screw just enough to keep it in place. Repeat
until all eight screws are installed in each of the frames.
Insert a button-head screw into one of the holes
on the x-frame. Loosly thread a T-slot nut onto the screw just enough to keep it in place. Repeat
until all eight screws are installed in each of the frames.
 Install four bushings onto each of the x-frames.
 Lay the x-frames sideways on the floor as shown.
Space them roughly the disired distance apart. You will set the actual spacing in a later step.
Make sure that all frames have the bushings facing the same direction.
Lay the x-frames sideways on the floor as shown.
Space them roughly the disired distance apart. You will set the actual spacing in a later step.
Make sure that all frames have the bushings facing the same direction.
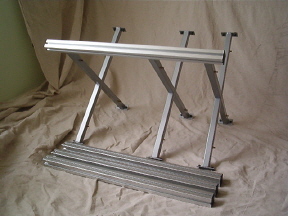 Slide one of the columns onto the x-frames.
Make sure that the column end-cap points in the same direction as the x-frame bushings. Do not
tighten any of the hardware until all columns are installed.
Slide one of the columns onto the x-frames.
Make sure that the column end-cap points in the same direction as the x-frame bushings. Do not
tighten any of the hardware until all columns are installed.
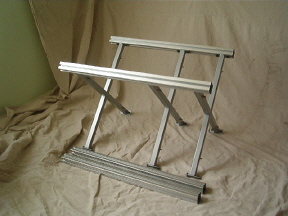 Install the second column just like the first,
paying attention to the direction of the end-caps.
Install the second column just like the first,
paying attention to the direction of the end-caps.
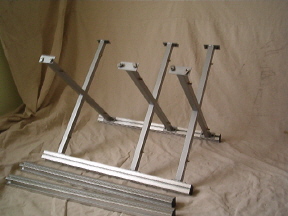 Carefully flip the rack over so that the first two
columns are on the floor.
Carefully flip the rack over so that the first two
columns are on the floor.
 Install the last two columns using the same
procedure as with the first two. Adjust the position of the x-frames while taking into account that
the platforms will use about 1 1/4 inch of space. Tighten all hardware.
Install the last two columns using the same
procedure as with the first two. Adjust the position of the x-frames while taking into account that
the platforms will use about 1 1/4 inch of space. Tighten all hardware.
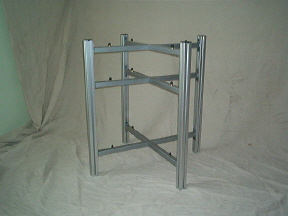 Carefully place rack in upright position.
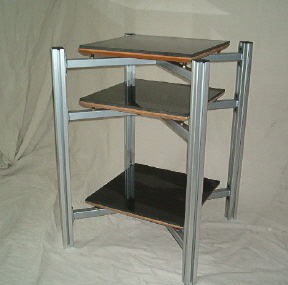 Set a platform on top of each of the x-frames.